Wiki
User Tools
Sidebar
Table of Contents
CryringBPM
Boot Procedure
After complete power cycle all AFCs should boot itself. Before CPU is going to boot MATPEX card need to be enabled.
Login to sdlx008.acc.gsi.de over SSH and connect to MCH console
#Left MCH
screen /dev/ttyACM0 19200   (STRG A + STRG D to detach vom screen)
#Right MCH
screen /dev/ttyACM1 19200
List all FRU using command show_fru
MATPEX occupies slot AMC2 (fru id 6)
After typing fru_start 6 MATPEX should go into state M4
After all modules are running you may enable CPU using command fru_start 5
FPGA boot/reset
Login to sdlx008.acc.gsi.de over SSH and check if hw server is running. If not type:
/opt/Xilinx/HWSRVR/2017.1/bin/hw_server
Open VivadoLab 2017.1 Open Hadware Manager session connect to sdlx008 jtag server
download scansta JTAG switch script https://raw.githubusercontent.com/qermit/AfcJtag/master/scansta_afc.tcl
source AxiJtag/scansta_afc.tcl
connect_hw_server -url sdlx008.acc.gsi.de:3121
scansta_enable_all
From FPGA context menu (right mous click on xc7a200t) select Boot from configuration memory
CPU need to be rebooted after FPGA boot.
FPGA paritial reset
Connect over JTAG to a module, probe file required
AFC 3.1 MMC Programming HowTo
MMC:
Install LPCXpresso on Linux PC.
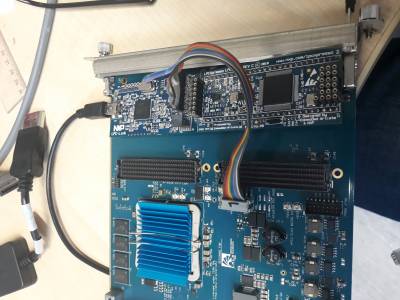
LPC_Link (1) on table with AFC on table
USB Cable connected to PC and LPC_Link
dedicated cable from Piotr to JTAG in the middle of AFC with cables heading to FMC connectors
on LPC Link J4 left row with Black = Pin15
enter command on Linux PC:
dfu-util -d 0x0471:0xdf55 -c 0 -t 2048 -R -D /usr/local/lpcxpresso/lpcxpresso/bin/LPCXpressoWIN.enc
/usr/local/lpcxpresso/lpcxpresso/bin/crt_emu_cm3_nxp -pLPC1768 -g -wire=winusb -load-base=0 -flash-load-exec=openMMC-full-afc-bpm-v1.4.0.bin
AFC Firmware (Sirius):
Before any FPGA configuration can be performed, you need to switch SCANSTA JTAG switch. Untill than FPGA won't be visible in Vivado. You will find instructions here
jtag_scansta.tcl (TCL-Script):
#set JTAG */xilinx_tcf/Xilinx/*
set JTAG */xilinx_tcf/Digilent/*

catch open_hw
catch {connect_hw_server -url localhost:3121}
get_hw_targets
current_hw_target [get_hw_targets $JTAG]
set_property PARAM.FREQUENCY 3000000 [get_hw_targets $JTAG]
catch {open_hw_target -jtag_mode 1}

run_state_hw_jtag reset
run_state_hw_jtag idle
scan_ir_hw_jtag 8 -tdi 00
scan_ir_hw_jtag 8 -tdi a0
scan_ir_hw_jtag 8 -tdi a5
scan_dr_hw_jtag 8 -tdi 5a
scan_ir_hw_jtag 8 -tdi c3
#On proper setup last step should return 0x00
scan_dr_hw_jtag 8 -tdi 5a -tdo 00
close_hw_target
open_hw_target
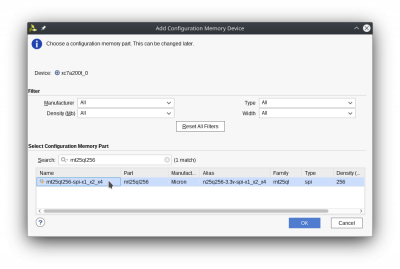
Flash Chip on AFC 3.1 for FPGA Firmware: mt25ql256-spi-x1_x2_x4
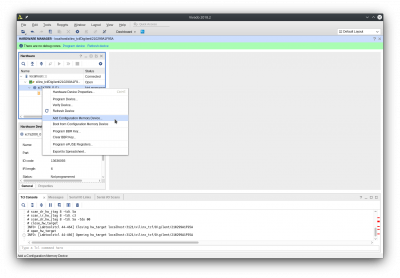
To add click with right mouse button on FPGA in Vivado Hardware Manager:
Then select the right SPI flash:
You will be asked if you want to program configuration memory device. You can cancel it as MCS configuration file must be generated first.
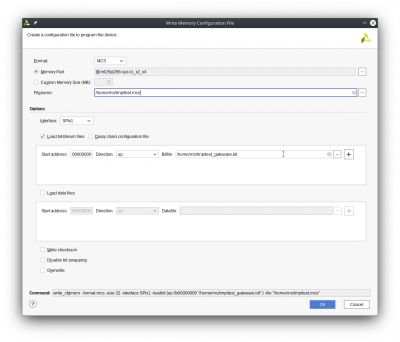
To generate MCS configuration file select Tools → Generate Memory Configuration File…
In the window please select right Memory Part, Filename (it's output file name) and tick that the file is to Load bitstream files. Then in the Bitfile input select your bitstream and click OK:
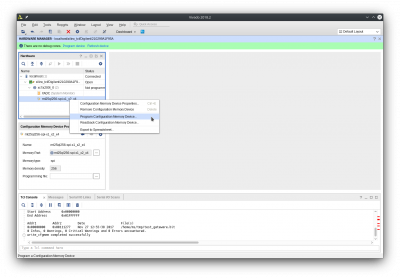
To program SPI flash click on the mt25ql256-spi-x1_x2_x4 in Hardware Manager tree and select Program Configuration Memory Device…
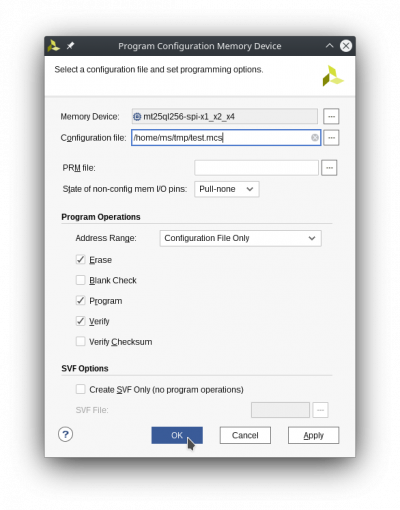
In the configuration window select created Configuration file and click OK:
SPI flash will be erased and programmed with new gateware.

